If you want Microsoft Word to fetch and display an image dynamically from a URL each time the document updates, follow these steps:
Step-by-Step Instructions
- Open a MS Word document and save it, naming it as required.
- Where you want the image to appear in the MS Word document, press Ctrl + F9 to insert field brackets { } (do not type them manually).
- Inside the brackets, enter the following:
INCLUDEPICTURE "https://training.bdphq.com/index.php?bdimg=123.jpg" \d - Press Alt + F9 to toggle field code off.
- Save your changes – no image will appear at this point
- Press F9, a placeholder image should appear as below, click Save.
- Press Alt + F9 to toggle field code on and amend the URL as appopriate – some BDP Examples are at the bottom of this page.
- Press Alt + F9 to toggle field code off and save changes.
- Upload the document to BDP Configuration>Configuration>Document Templates widget.

Using the document
- Use this document like any other document templates uploaded to BDP.
- Navigate to a property to generate and open the document via the Document Store widget.
- When the document downloads, click Enable Editing in MS Word (this is a security feature because it was downloaded from the web).
- Click on the image in the document, then press F9 to update it.
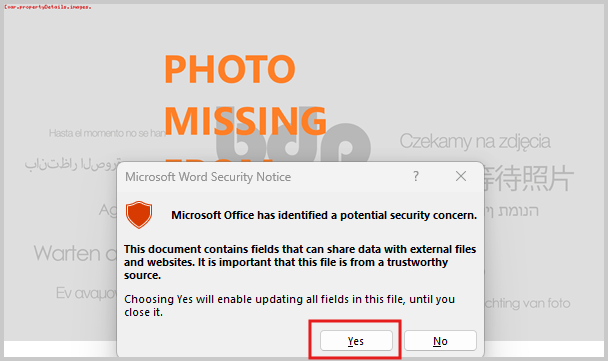
- A Microsoft Security Notice may appear because the image is hosted externally on BDP. Click “Yes” to proceed.
- The image hosted on BDP will now be imported to the MS Word document


Example URLs
Here are some example profile picture links you might use:
https://training.bdphq.com/index.php?bdimg=[var.negDetails.proPic]
https://training.bdphq.com/index.php?bdimg=[var.valuerDetails.proPic]
https://bdphq.com/index.php?bdimg=[var.negDetails.proPic]
This method allows MS Word to pull images dynamically, ensuring profile pictures are always up to date when the document is refreshed.
REMEMBER The different URL between the Training and Live platforms.